

Chapters · Chapter 1 of 8
Get the Basics project ready
Install the Basics project, start Pinman, connect to this machine, and open the Dashboard.
What to expect#
You'll get the basics sample project in place, make sure Pinman is running, open its interface in your browser, connect to this computer, and arrive at the Dashboard.
CLI and UI#
Pinman has both a command-line interface (CLI) and a browser-based user interface (UI). The browser can run on this computer, or connect from another device on the same network. Here we'll assume it's on the same computer running Pinman.
The Basics project#
The basics project is a disposable sample. It creates a small directory of files representing what you might see on a real video-production workstation. Assume this fictional system and its application files are configured for your familiar day-to-day work.
The following image shows the fictional files you'll be working with:
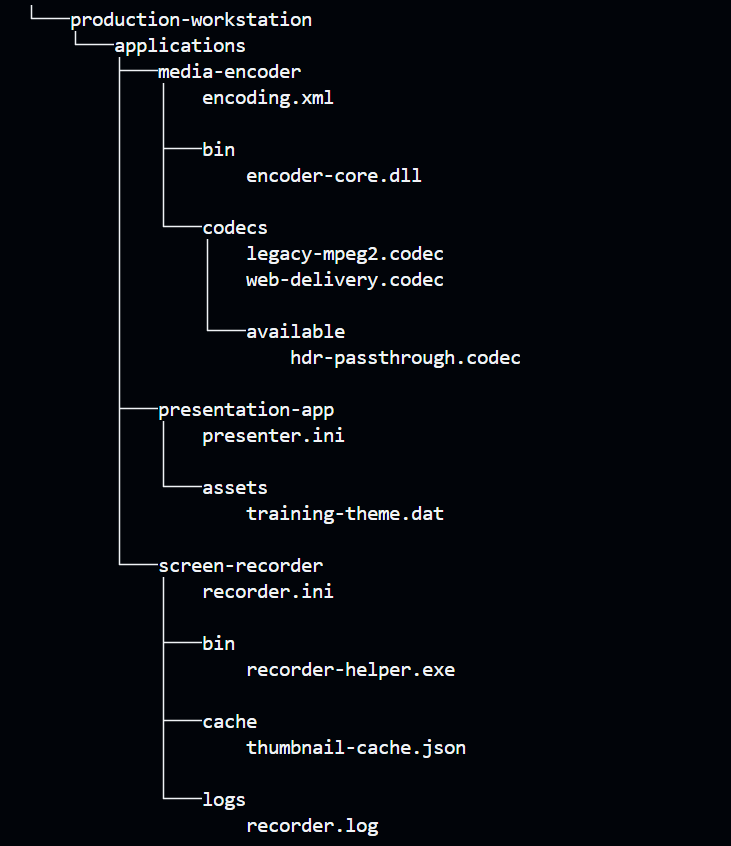
Pinman keeps the project inside its own data area and makes it the active project. Nothing in it touches your real applications, documents, or settings.
Steps#
Install the project#
PowerShell is the command window included with Windows. You do not need to run it as Administrator for this tutorial.
-
If the basics tutorial project is not yet installed, open the Start menu, type
PowerShell, select Windows PowerShell, and run:pinman tutorial install basicsAnswer the prompts: if a basics project already exists, confirm y to wipe and re-seed it; if Pinman is running, approve stopping it first.
This creates the project, imports the tutorial schema, and copies the fictional workstation files into it.
Start Pinman services and open in your browser#
-
If Pinman is not running, open it from the Windows Start menu, or run:
pinman service start
Wait for its services to come up. A Welcome screen may appear to show startup progress and then close automatically.
When Pinman is running, look for the Pinman tray icon in the Windows notification area at the right end of the taskbar (system tray). If the icon is hidden, select the Show hidden icons arrow.
- When the Pinman tray icon appears, right-click it and select Open Pinman.
For more on installing and starting Pinman, see the Getting Started documentation page.
Connect to your machine#
- In the browser, on the Pinman home network page, select your computer. If you're not already connected, this takes you to the Connections page.
If you don't see the machine, make sure Pinman is running and select Scan for Machines. For more about finding and authorizing computers on the network, see the Connect to a machine documentation page.
- Select the connection control on the machine's card, then select the
Technician role. Enter your Technician PIN. If you have not changed it,
the default is
4321. - Once connected, select the open icon to enter the machine. This takes you to the Dashboard.
The Technician Dashboard#
The Dashboard is Pinman's starting point. As the following screenshot shows, there is not much to see because you have not yet captured any state:
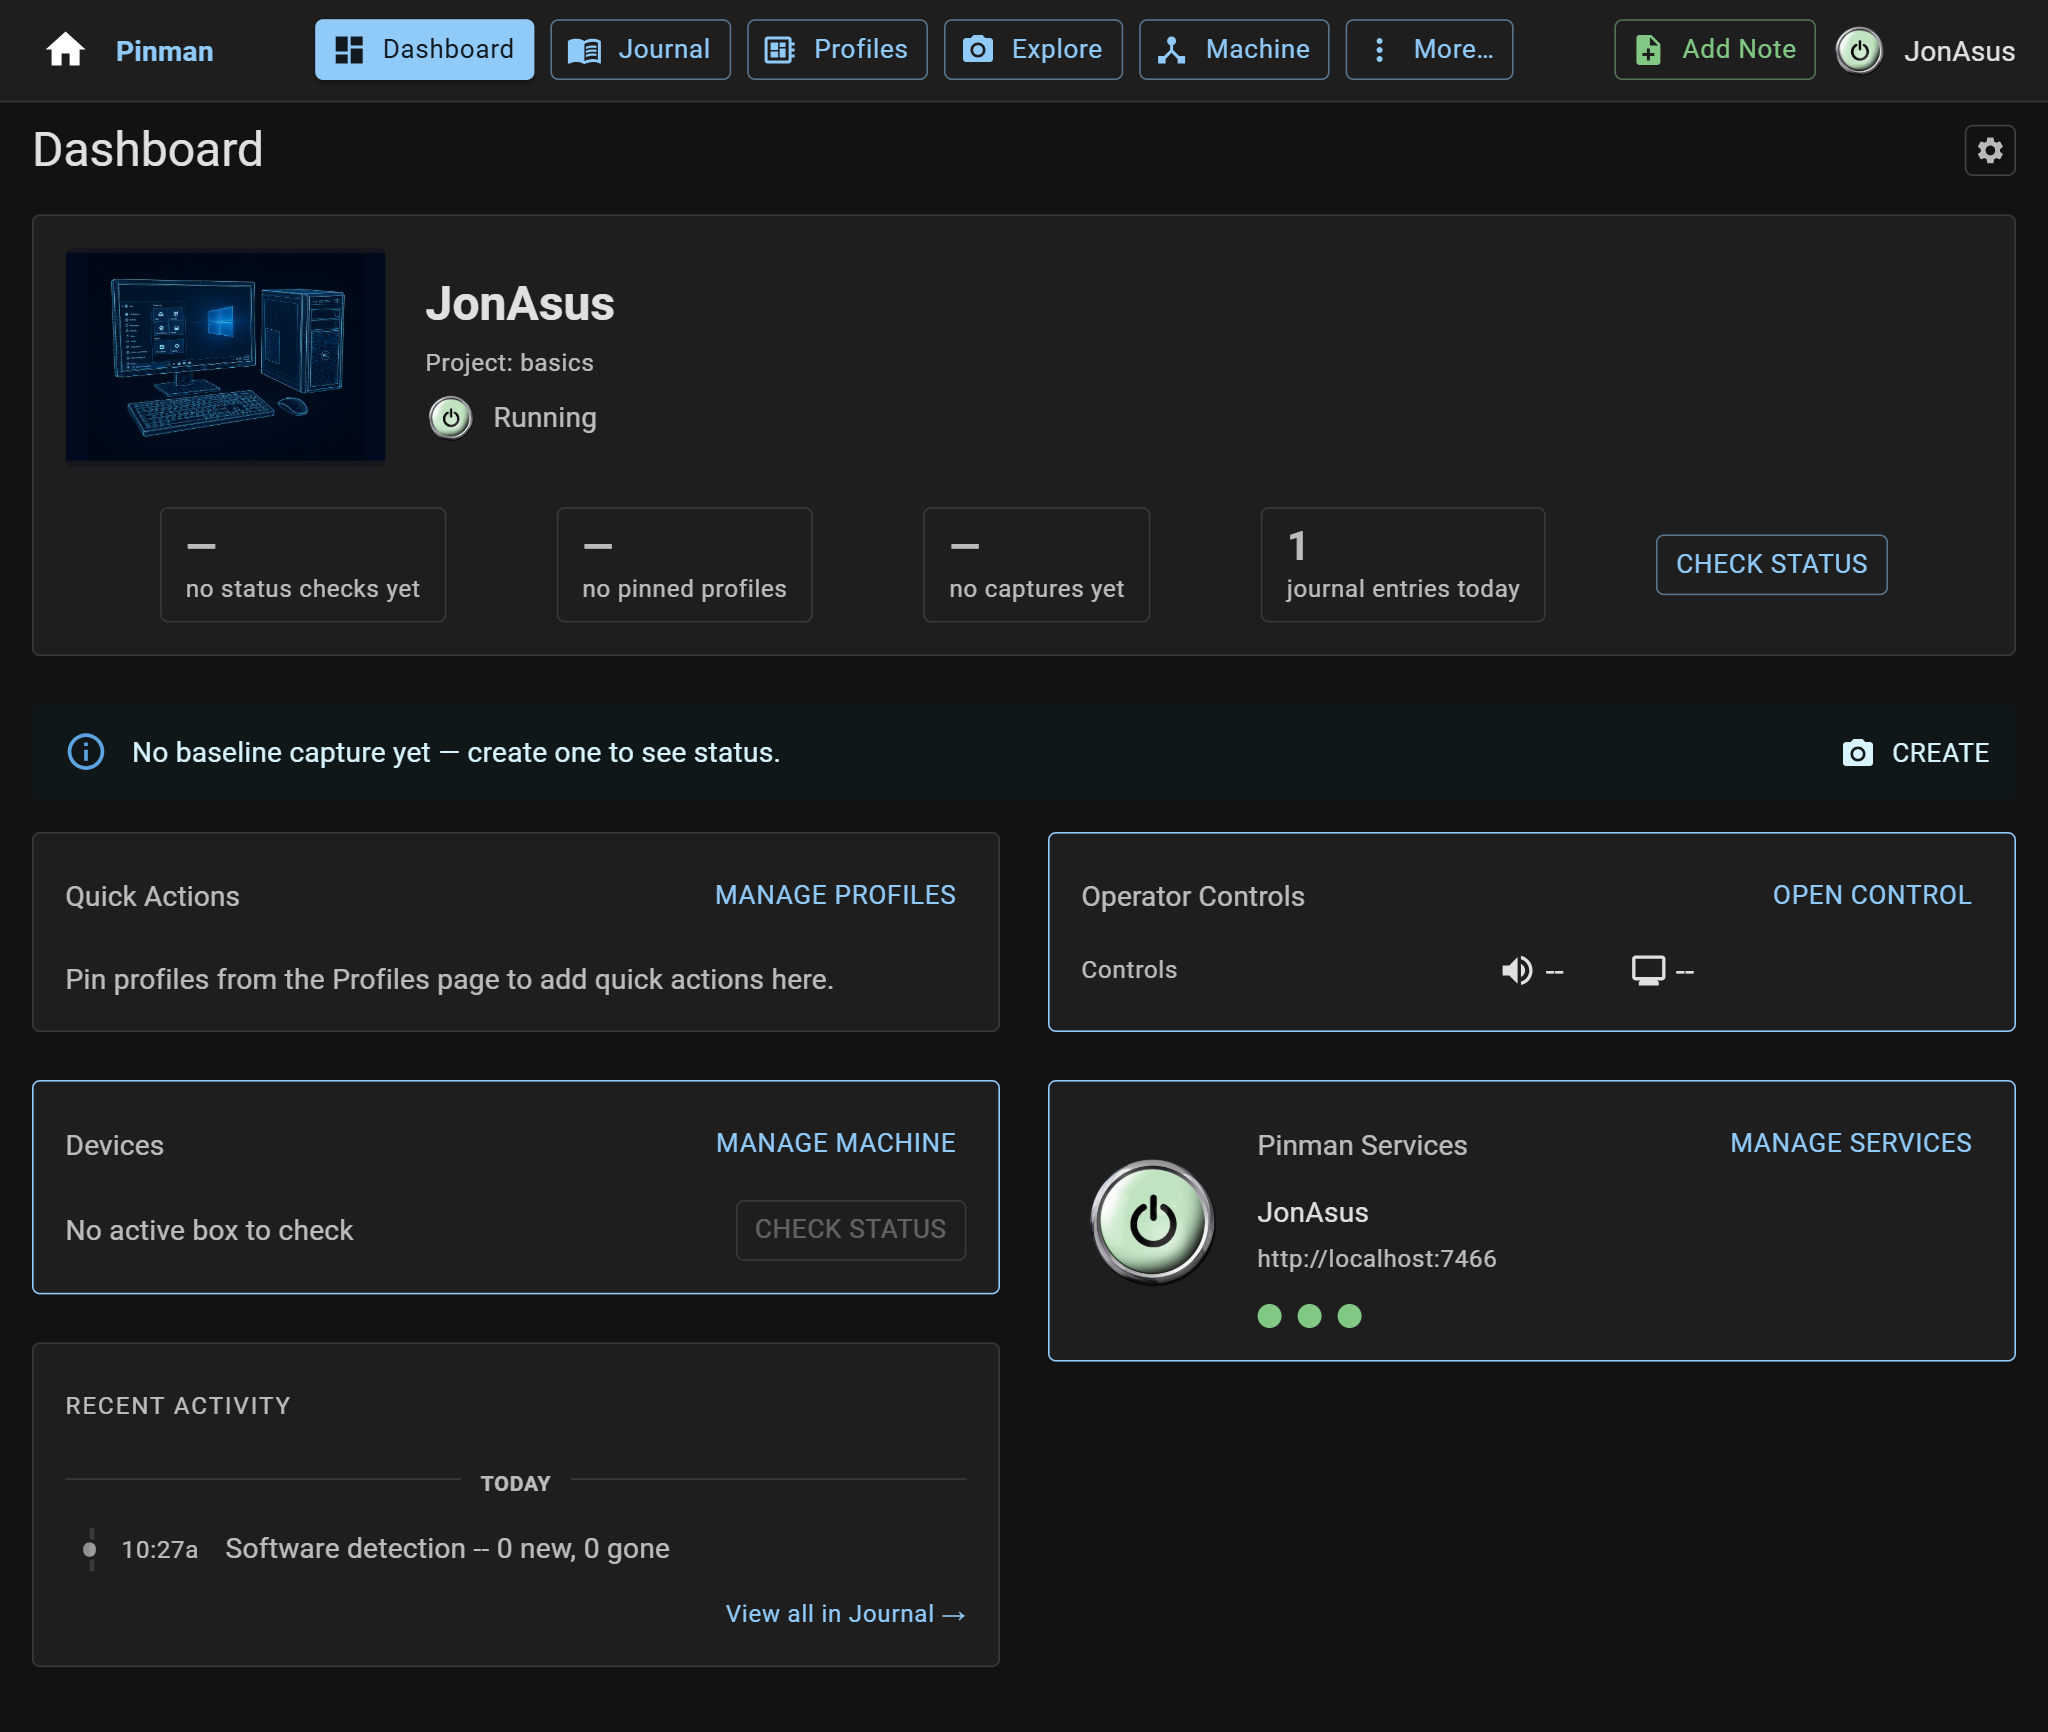
The main navigation, shown below, leads to the four areas you'll use in this tutorial:

- Journal — write notes and create Captures of your machine state.
- Profiles — inspect and apply named configurations.
- Explore — inspect current state and compare it with other captured states.
- Machine — inspect hardware devices, ports, and other system properties.
What we did#
You installed the basics sample project, with its fictional video-production workstation files. You made sure the Pinman services were running, opened the Pinman browser UI, connected to the machine, and opened its Dashboard.
You're now ready to capture your first Checkpoint.
Instructions#
-
If the basics tutorial project is not yet installed, open the Start menu, type
PowerShell, select Windows PowerShell, and run:pinman tutorial install basicsAnswer the prompts: if a basics project already exists, confirm y to wipe and re-seed it; if Pinman is running, approve stopping it first.
-
If Pinman is not running, open it from the Windows Start menu, or run:
pinman service start -
When the Pinman tray icon appears, right-click it and select Open Pinman.
-
In the browser, on the Pinman home network page, select your computer. If you're not already connected, this takes you to the Connections page.
-
Select the connection control on the machine's card, then select the Technician role. Enter your Technician PIN. If you have not changed it, the default is
4321. -
Once connected, select the open icon to enter the machine. This takes you to the Dashboard.