

Getting started
Install Pinman and open your first project.
Install Pinman 2 on a Windows computer, create a project, and connect to the Technician dashboard.
Pinman 2 is beta software. Features may change, and all features are unlocked during the beta.
It reads and writes real configuration on the machine you install it on — files, registry keys, and Windows settings. Read-only mode is on by default; you disable it to allow writes.
The Basics tutorial is safe to work through: it stays inside its own disposable project folder. Beyond it you are pointing Pinman at your own files and settings, and the responsibility for what happens to them is yours. Back up anything you can't afford to lose, and prefer a machine you can rebuild over your only working setup.
Download and install Pinman
Pinman runs on Windows 10 or 11 (64-bit). Download and run the Pinman 2 Installer (.exe).
The installer is signed by Parkerhill Technology Corporation — confirm that name in the Windows approval prompt. Windows SmartScreen may show a blue “Windows protected your PC” screen because Pinman is new. Select More info, then Run anyway to continue.
Approve the administrator prompt. For the quickest start, leave Set up a project now, Start Pinman, and Open the Pinman dashboard selected.
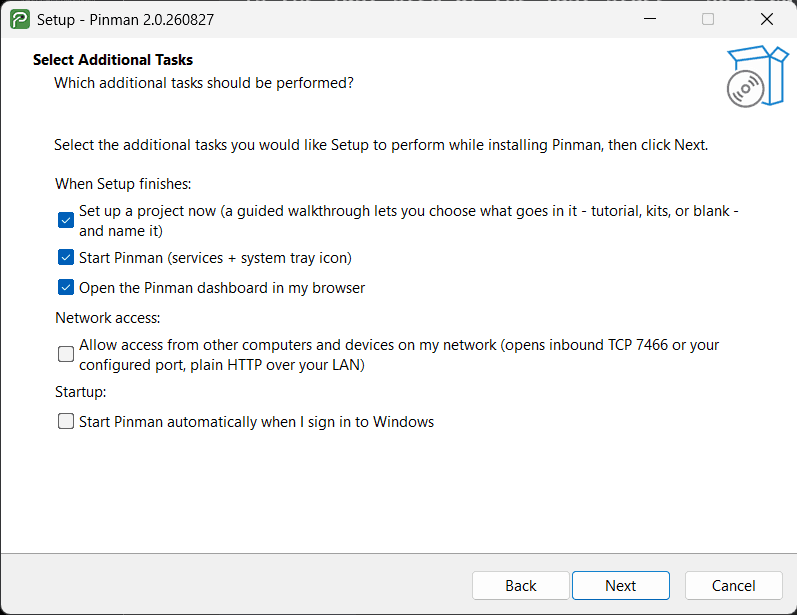
Enable Allow access from other computers and devices on my network only on a trusted local network. It adds a Windows Firewall rule; see Networking, HTTPS & IT for details. Start at Login is optional and can be changed later from the tray menu.
Choose your first project
A project defines the machine configuration Pinman will track. The installer offers to create one; you can also run pinman setup later. Choose a starting point:
Basics tutorial
A safe sample project for learning the main workflow. Best for a first look; it accompanies the Basics tutorial.
Another setup
Use a setup supplied by your organization, technician, or software provider.
Start from scratch
Create an empty project and decide for yourself which files and settings Pinman should track.
New projects start in read-only mode. Pinman can inspect configuration and write its own records, but it will not change application data, Registry values, or Windows settings. Enable write access later by turning off Machine read-only on the Pinman Config page.
Open and connect to Pinman
Open Pinman from the Windows Start menu, or choose Open Pinman from its tray icon. If you kept the installer default, the dashboard may already be open in your browser.
The Machine Connections page lists this computer at http://localhost:7466 with an Available status.
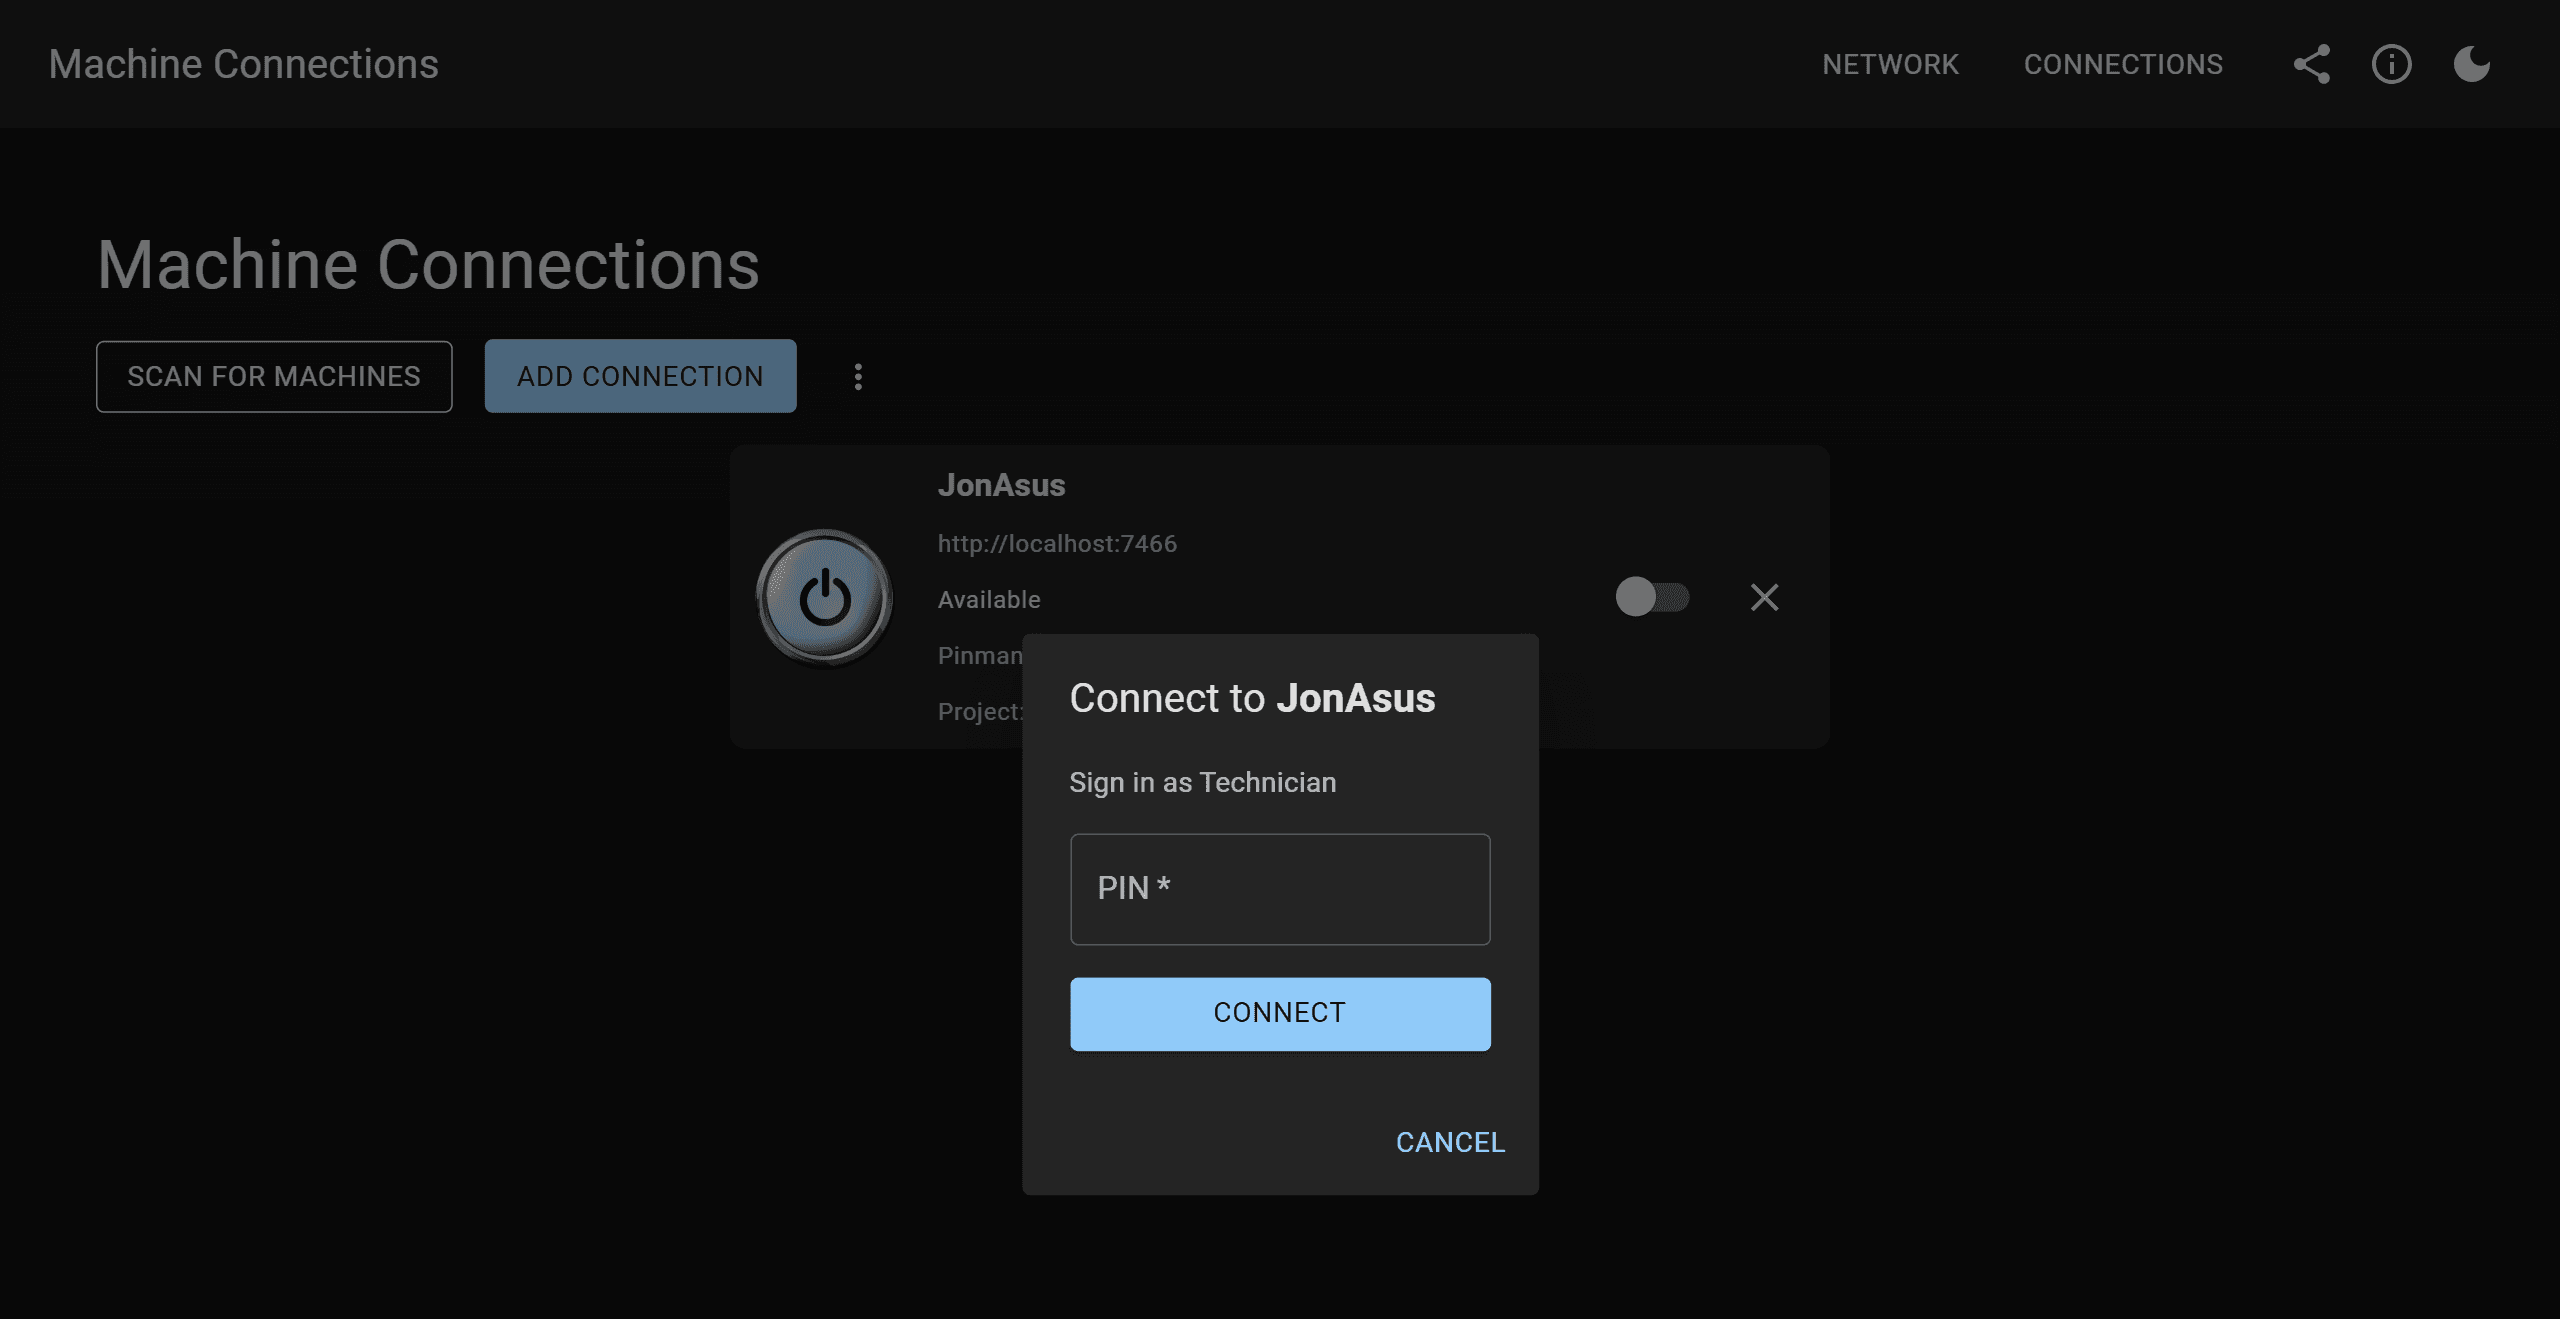
- Select the connection control on the machine's card.
- Choose Technician.
- Enter that role's PIN and select Connect. The default Technician PIN is 4321.
- Select the open icon to enter the machine.
The Technician dashboard opens with your project selected. Use the same connection control to disconnect; this does not stop Pinman or power off the computer. To connect from another device, see Connect to a machine.
Continue with the Basics tutorial
You're ready to explore: continue with the Basics tutorial to learn Pinman using a safe sample project. If you did not install it during setup, the first chapter shows you how.
Need help getting connected? Open an issue.