

Chapters · Chapter 3 of 7
Unify application configuration
Present configuration from different applications in one readable view.
Joining here?
Stop Pinman, run this command, then start Pinman again. It rebuilds the sample project up to this point, discarding any work you have already done in it.
pinman tutorial goto unifyWhat to expect#
Pinman can present important configuration from several applications in one understandable view, even when the applications store configuration differently. In this chapter, you'll add the media encoder's settings from an XML data file with one bulk tracking action, then give two settings clearer labels. The result is one view of the presentation, recording and encoding configuration.
Schema authoring workflow
- Choose what mattersfirst tracked file
- Describe configurationsettings + labels
- Keep noise outMatching Rules
- Prove the schemacompare with baseline
- Extend beyond filesRegistry + Windows
Steps#
Add the encoder settings#
You're still in Explore, looking at Head. The media encoder keeps its settings
in encoding.xml, with separate Video and Audio sections. Setting Track
as to XML data file lets Pinman show that structure.
- Under
applications, scanmedia-encoderto revealencoding.xml. - Right-click
encoding.xmland select Track item…. - Under Track as, choose XML data file.
- Select Track.
Once encoding.xml is tracked as an XML data file, you can scan it.
- Scan
encoding.xml, then scan itsVideoandAudiosections.
Explore now shows the settings inside both sections. Each setting's location
includes the XML structure: the location for Quality, for example, ends in
#Video/Quality.
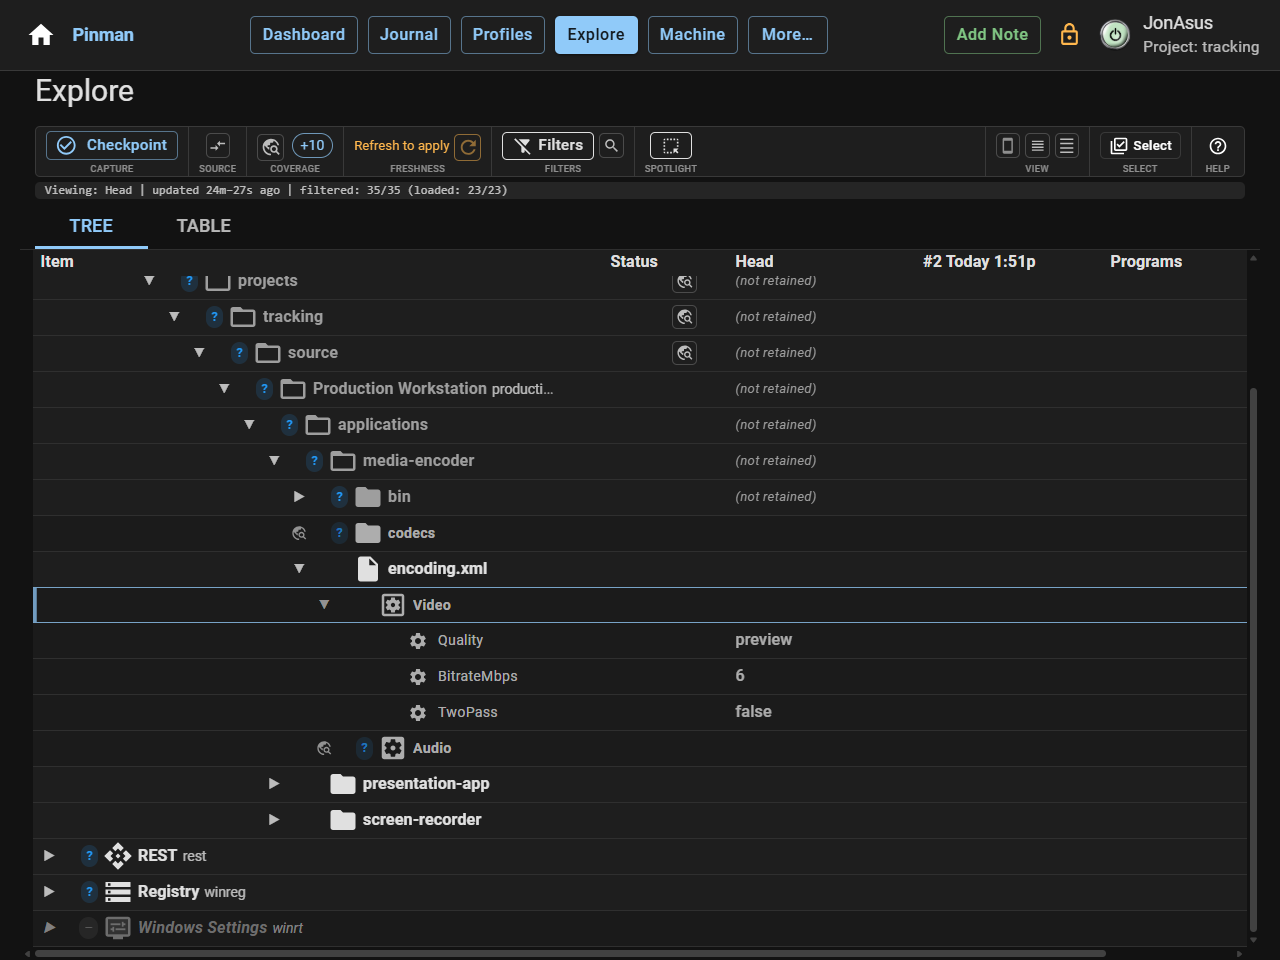
The tutorial uses these five settings:
| Section / setting | Data Type | Current value |
|---|---|---|
Video/Quality | string | preview |
Video/BitrateMbps | int | 6 |
Video/TwoPass | bool | false |
Audio/Normalize | bool | true |
Audio/TargetLufs | int | -16 |
Select mode lets you track all five settings together. It adds a checkbox to each row and opens a bar at the bottom of Explore.
- In the Explore toolbar, select Select (towards the right).
- Select the checkboxes for the five encoding.xml settings listed above.
- In the bar at the bottom of Explore, select Track.
- In the Explore toolbar, select Select again to leave Select mode.
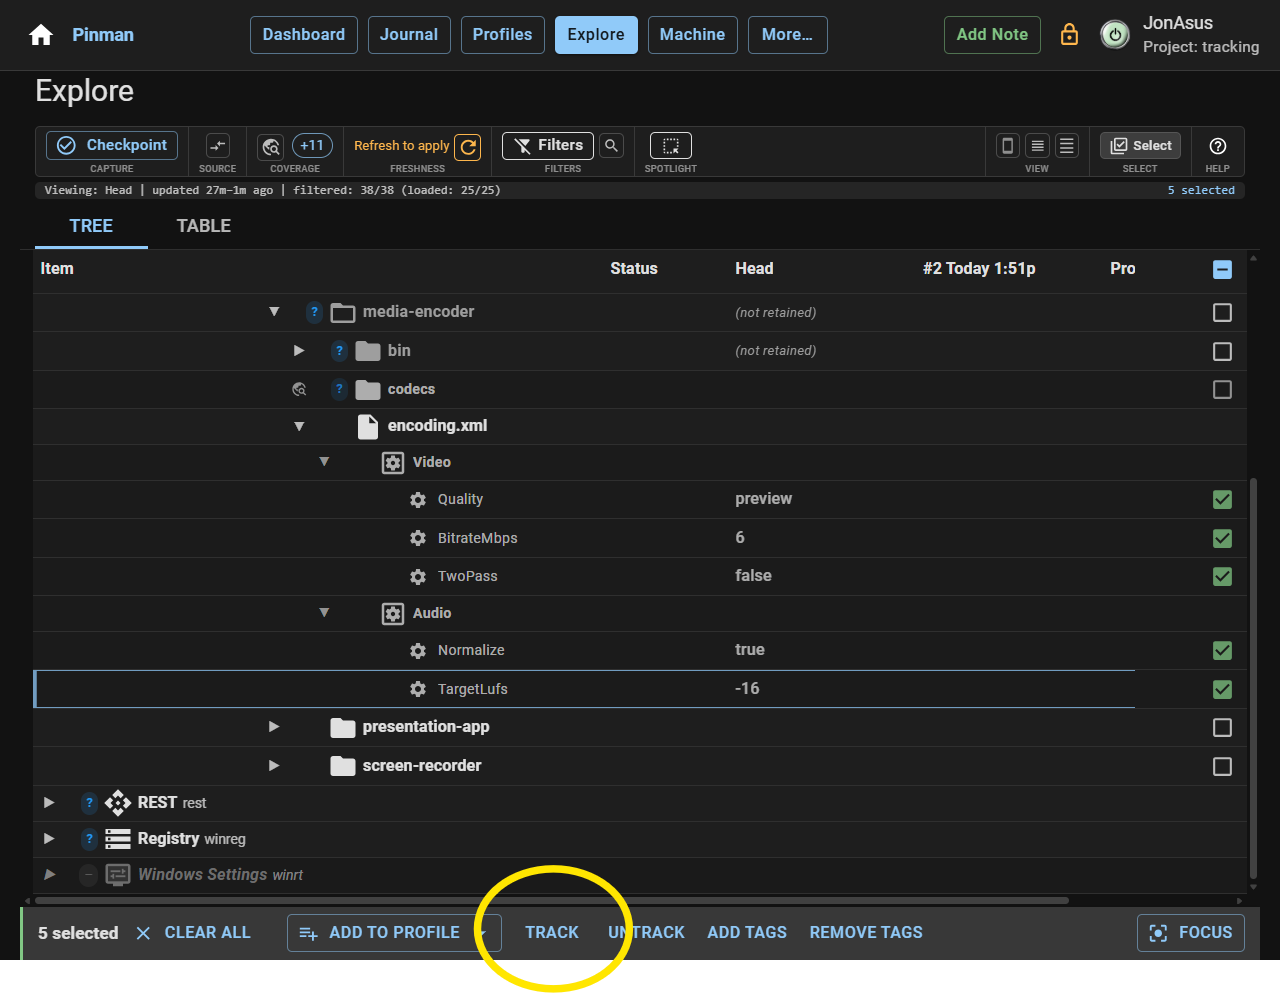
The schema now includes all five encoder settings. Only encoding.xml needs to
be refreshed to apply the new definitions to Head; the rest of the Capture does
not need to be refreshed.
- To settle everything, refresh the Head using Refresh (or Refresh to apply) on the Explore toolbar.
Head now includes the selected presentation, recording and encoding settings.
See the schema you have built#
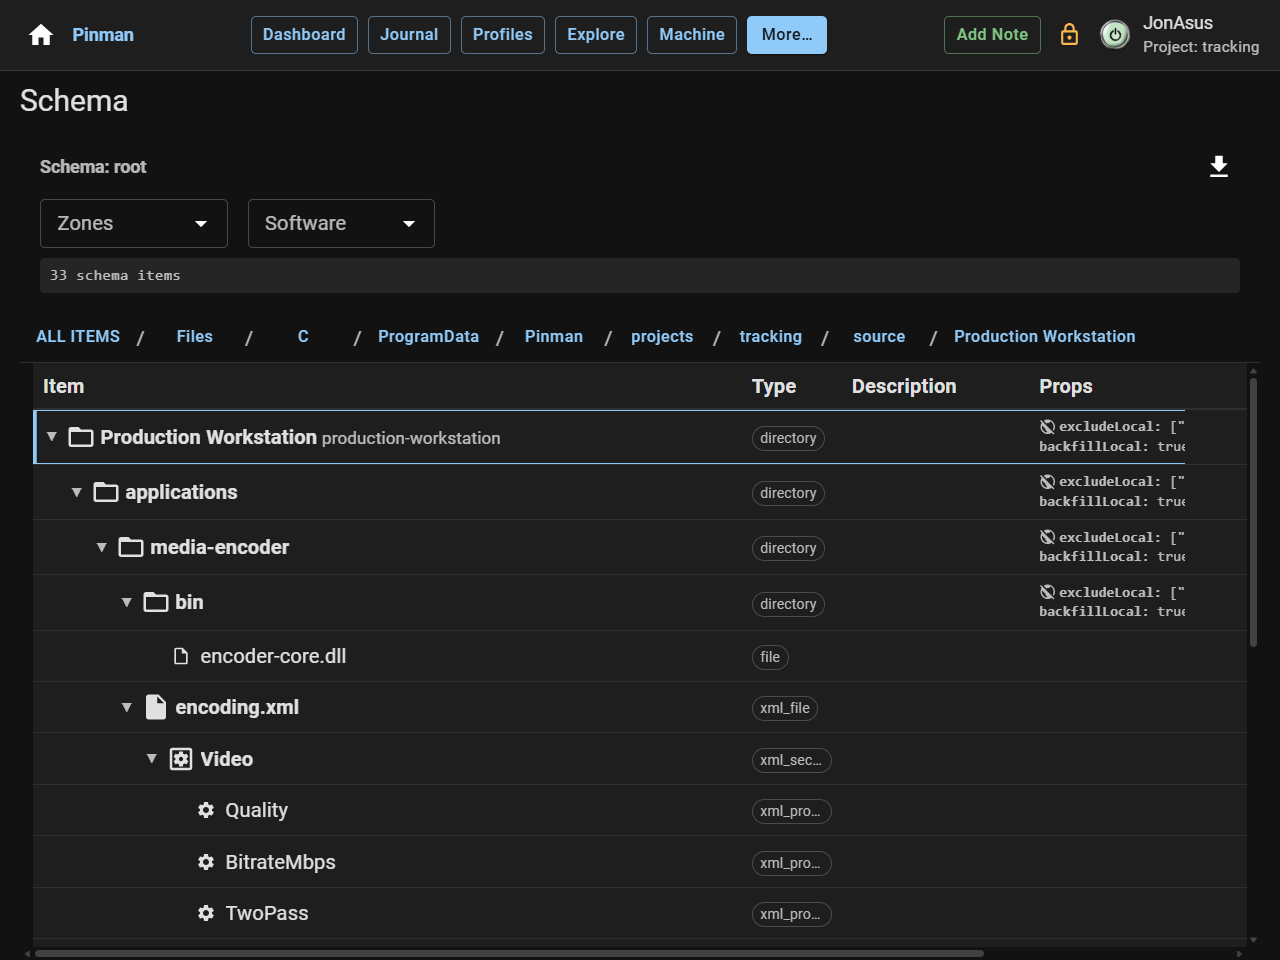
So far, you have built the schema from Explore. The Schema page shows every tracked definition in one place. You can inspect and edit Track as, Data Types and labels here.
- Open More → Schema.
- Double-click Files to expand the full tree.
The Schema tree shows Production Workstation, its tracked files and the settings you selected. Any optional settings you added in the previous chapter appear too. Items that you only revealed by scanning do not appear in the schema.
Add useful labels#
A schema is easier to use when its labels match wording you recognize.
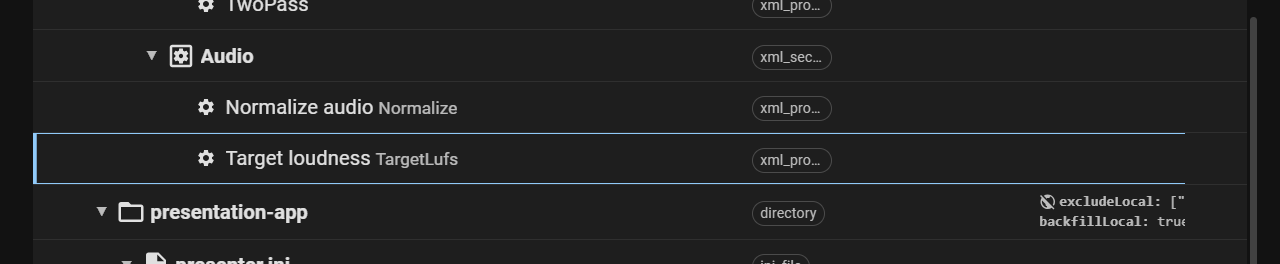
Normalize and TargetLufs are the names stored in the XML file. Normalize
audio and Target loudness explain the settings at a glance.
- Right-click
Normalizeand select Edit tracking… (or select its edit icon), set Label to Normalize audio, then select Save. - Repeat for
TargetLufs, using the label Target loudness.
The labels update without refreshing Head.
- Return to Explore.
Head shows the presentation, recording and encoding settings together. Their locations still identify the original files and sections, while the two audio settings appear as Normalize audio and Target loudness.
What we did#
You used bulk tracking to add the encoder settings, refreshed only the affected XML file and brought selected configuration from three applications into one view. Pinman keeps each setting's source location, while Data Types and labels make the combined configuration easier to understand.
Next, you'll use Matching Rules to include useful files automatically while keeping logs and caches out.
Instructions#
-
Under
applications, scanmedia-encoderto revealencoding.xml. -
Right-click
encoding.xmland select Track item…. -
Under Track as, choose XML data file.
-
Select Track.
-
Scan
encoding.xml, then scan itsVideoandAudiosections. -
In the Explore toolbar, select Select (towards the right).
-
Select the checkboxes for the five encoding.xml settings listed above.
-
In the bar at the bottom of Explore, select Track.
-
In the Explore toolbar, select Select again to leave Select mode.
-
To settle everything, refresh the Head using Refresh (or Refresh to apply) on the Explore toolbar.
-
Open More → Schema.
-
Double-click Files to expand the full tree.
-
Right-click
Normalizeand select Edit tracking… (or select its edit icon), set Label to Normalize audio, then select Save. -
Repeat for
TargetLufs, using the label Target loudness. -
Return to Explore.