

Chapters · Chapter 1 of 7
Define what matters
Start with a blank project and choose exactly what your schema tracks.
What to expect#
You'll install the tracking tutorial project, connect to your machine and
start the schema by tracking a specific file we want to monitor for changes. In
the fictional workstation, we'll track encoder-core.dll as Whole file.
You'll use scanning to find this DLL, then create a Checkpoint showing that it
is the only tutorial file tracked so far.
Schema authoring workflow
- Choose what mattersfirst tracked file
- Describe configurationsettings + labels
- Keep noise outMatching Rules
- Prove the schemacompare with baseline
- Extend beyond filesRegistry + Windows
The Tracking project#
The tracking project is disposable. It contains the fictional video-production system introduced in the tutorial. The system is ready to explore, but its schema is blank.
Pinman keeps the project inside its own data area. The sample files do not touch your real applications, documents or settings.
Steps#
Install the project#
First, install the tutorial project. You will run the setup command in PowerShell, the command window included with Windows. You do not need to run it as Administrator for this tutorial.
-
Open PowerShell and run:
pinman tutorial install tracking
This creates the project, copies the sample files into it and makes the project active. The schema is still blank.
Start Pinman and open it in your browser#
-
If Pinman is not running, open it from the Windows Start menu, or run:
pinman service start
Wait for the service to start. Then open the UI in your browser.
- Right-click the Pinman tray icon and select Open Pinman. (If the icon is hidden, select the Show hidden icons arrow.)
Connect to your machine#
Connect as Technician, the role that lets you configure tracking in Pinman.
- On the Pinman home network page, select your computer.
- If you are not already connected, select the connection control, then select
the Technician role. Enter your Technician PIN if prompted; the default is
4321if you have not changed it. - Select the open icon to enter the machine.
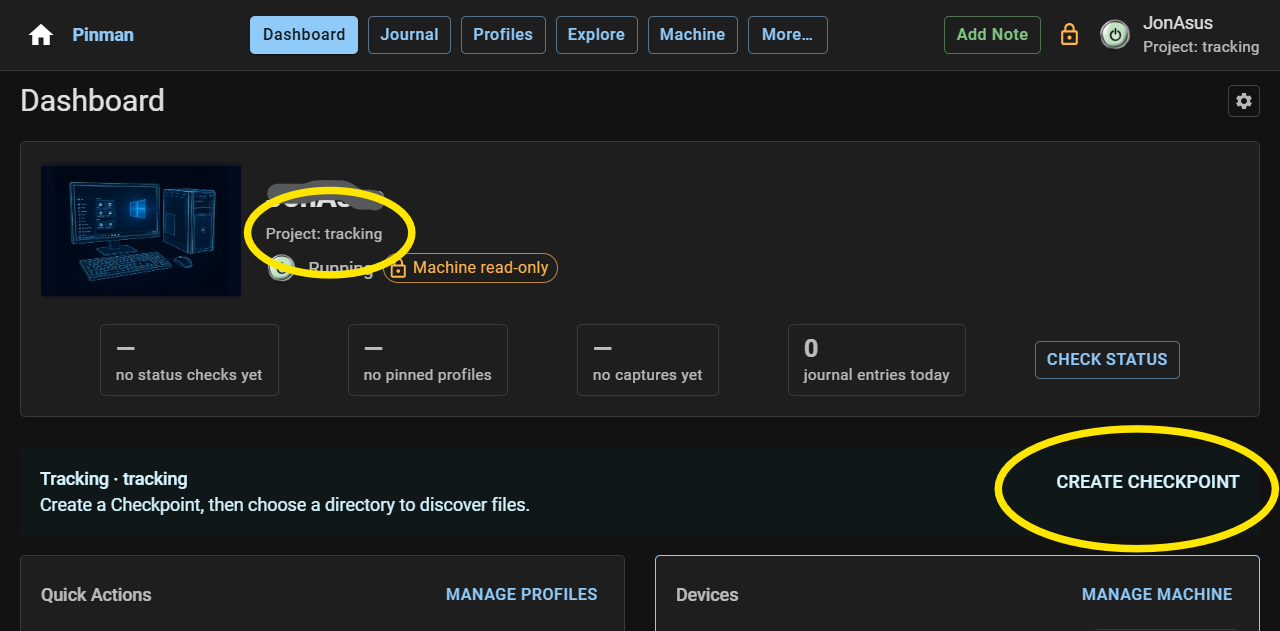
Entering the machine takes you to the Dashboard.
Create a starting Checkpoint#
To explore the current machine state, you first need a Capture of it. The new project does not have a Capture yet, so the Dashboard's Tracking panel offers Create Checkpoint. A Checkpoint is a Capture you keep for later comparison.
- In the Tracking panel, select Create Checkpoint.
- In Title, enter Blank project.
- Select Create Checkpoint and wait for it to complete. Then press Close.
The Checkpoint is nearly empty because the schema is blank. You can now use Explore to choose what to track.
Find the fictional workstation#
The Dashboard now offers Find files to Track. This opens Explore, where you can scan folders for untracked files.
- On the Dashboard, select Find files to Track.
You can also open Explore from the main navigation.
The fictional workstation is inside the project's data folder, known as its
project home. The default folder containing encoder-core.dll is:
C:\ProgramData\Pinman\projects\tracking\source\production-workstation\applications\media-encoder\bin
That's a mouthful, but it gives us a path to follow. If you used another project name or location, follow that path instead.
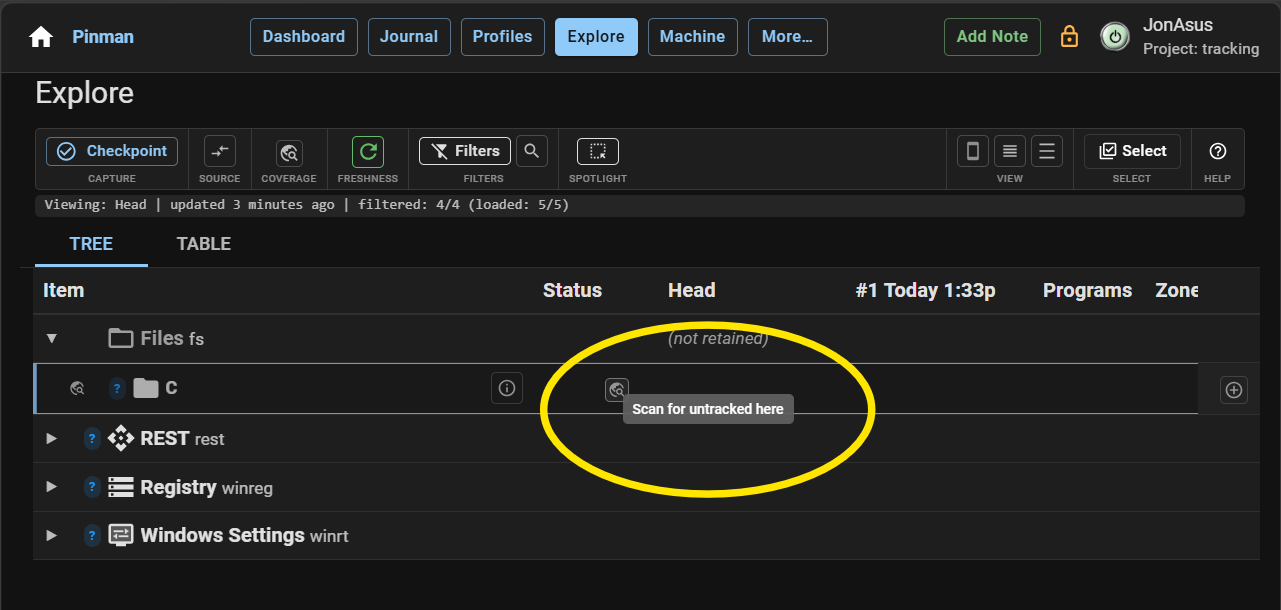
Explore opens at Files, the root for files and folders. Its globe icon is named Scan for untracked here. A scan reveals one level at a time. Scanning changes what you can see in Explore; it does not add anything to the schema.
- On the Files row, select Scan for untracked here.
Your computer's drives appear, including C:.
- On the C: row, select Scan for untracked here.
The top-level folders include Program Files, Windows and others, but not
ProgramData. Windows hides this folder. When a scan leaves out hidden items,
the folder row offers an action such as Show 2 hidden. The number varies by
computer.
- On the C: row, select Show … hidden to reveal
ProgramData. - Follow the path above (
ProgramData\Pinman\projects\tracking\source), selecting Scan for untracked here on each folder. - Continue into
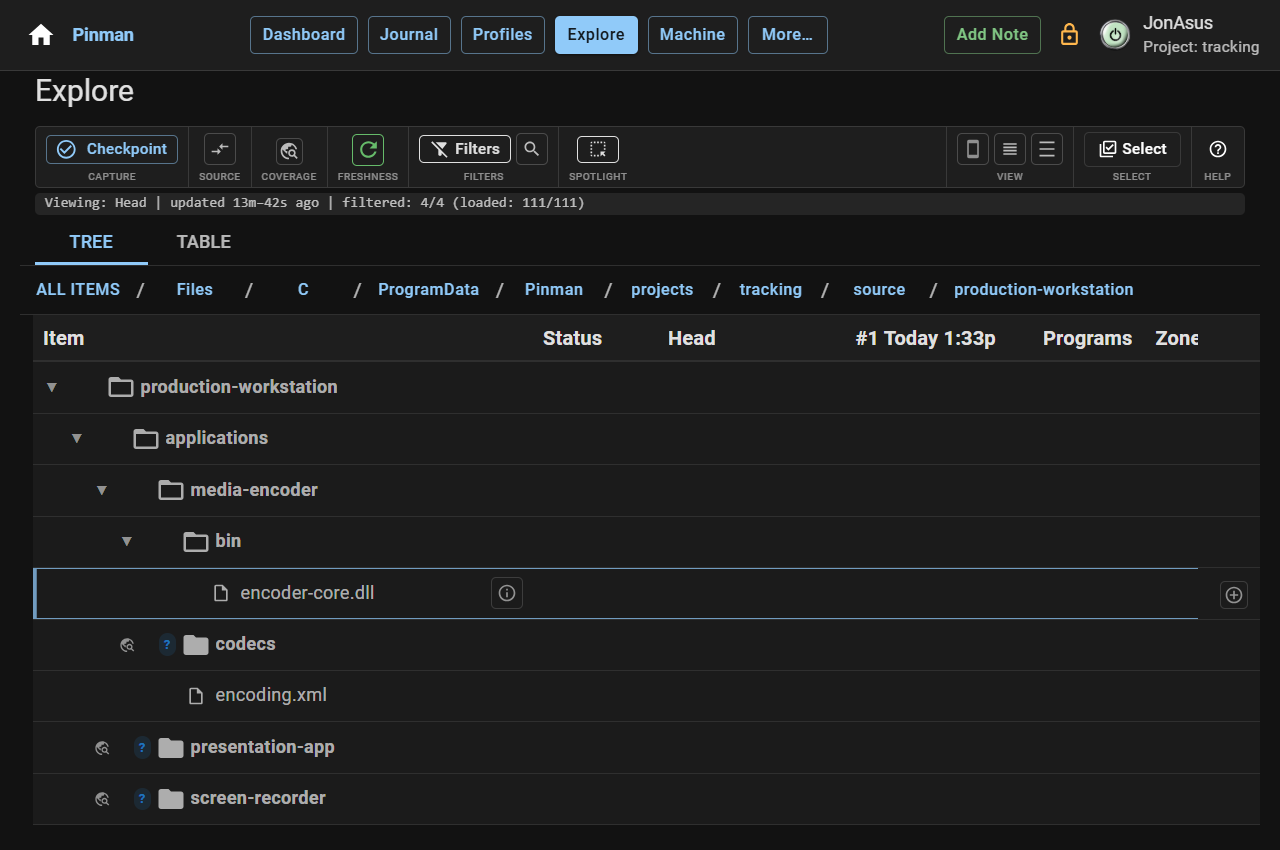
production-workstation\applications\media-encoder\bin.
encoder-core.dll now appears as an untracked file.
Track one whole file#
For the first schema choice, track encoder-core.dll as a single item. The
Track as choice for this is Whole file.
- Right-click
encoder-core.dlland select Track item…. - Under Track as, ensure Whole file is selected.
- Select Track.
- On the Explore toolbar, select Refresh to apply and wait for the refresh to complete.
encoder-core.dll is now tracked. Pinman also adds the parent folders in its path to
the schema, but it does not track the other files in those folders. Applying the
tracking change also unfolds the parent path so each folder can be edited.
Give the workstation a useful name#
The folder name production-workstation identifies the tutorial folder on disk.
A label changes the name shown in Pinman without changing the folder's real
name or location.
- Right-click
production-workstationand select Edit tracking…. - Set Label to Production Workstation, then select Save.
The Explore tree now shows Production Workstation.
See what the schema tracks#
Explore still includes the files and folders revealed by scanning. Create a new Checkpoint to see what the schema tracks.
- On the Explore toolbar, select Checkpoint.
- In Title, enter First tracked file, then select Create Checkpoint and wait for it to complete.
Explore now shows encoder-core.dll beneath Production Workstation, together
with the folders in its path. The other files revealed by scanning are gone from
the view. Scanning found the DLL; tracking added the DLL to the schema.
What we did#
You installed the tracking tutorial project and made the first choice in its
schema. You scanned the fictional workstation, tracked encoder-core.dll as
Whole file and gave the workstation a readable label. The new Checkpoint
shows that scanning changes the Explore view, while tracking changes the schema.
Next, you'll look inside two application data files and choose individual settings to track.
Instructions#
-
Open PowerShell and run:
pinman tutorial install tracking -
If Pinman is not running, open it from the Windows Start menu, or run:
pinman service start -
Right-click the Pinman tray icon and select Open Pinman. (If the icon is hidden, select the Show hidden icons arrow.)
-
On the Pinman home network page, select your computer.
-
If you are not already connected, select the connection control, then select the Technician role. Enter your Technician PIN if prompted; the default is
4321if you have not changed it. -
Select the open icon to enter the machine.
-
In the Tracking panel, select Create Checkpoint.
-
In Title, enter Blank project.
-
Select Create Checkpoint and wait for it to complete. Then press Close.
-
On the Dashboard, select Find files to Track.
-
On the Files row, select Scan for untracked here.
-
On the C: row, select Scan for untracked here.
-
On the C: row, select Show … hidden to reveal
ProgramData. -
Follow the path above (
ProgramData\Pinman\projects\tracking\source), selecting Scan for untracked here on each folder. -
Continue into
production-workstation\applications\media-encoder\bin. -
Right-click
encoder-core.dlland select Track item…. -
Under Track as, ensure Whole file is selected.
-
Select Track.
-
On the Explore toolbar, select Refresh to apply and wait for the refresh to complete.
-
Right-click
production-workstationand select Edit tracking…. -
Set Label to Production Workstation, then select Save.
-
On the Explore toolbar, select Checkpoint.
-
In Title, enter First tracked file, then select Create Checkpoint and wait for it to complete.